
In ASP.NET Web Application Project, it is very easy to change project running between local IIS and IIS Express.
However, in ASP.NET Website Project, there is no easy option to change IIS type after project is created.
This tutorial will guide you on how to change ASP.NET Website Project from using IIS Express to local IIS and vice versa.
2 Move from Local IIS to IIS Express
1Right click on your project, and click "Open Folder in File Explorer".

Table of Contents
1 Move from IIS Express to Local IIS2 Move from Local IIS to IIS Express
Move from IIS Express to Local IIS

2Copy everything in this folder.

3Go to IIS Folder: "C:\inetpub\wwwroot", and then create new folder.

4You should name your folder to be the same as project name in step 1.

5Open the folder you created, and paste the content you copied from step 2.

6The result should look like this.

7Open IIS Manager, right click on "Sites/Default Web Site" node, and click "Add Application".
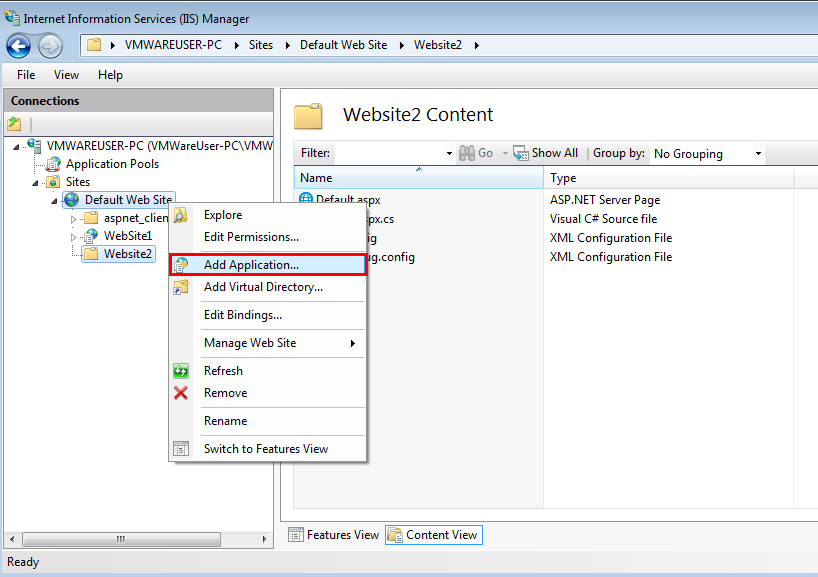
8Under "Alias" textbox, set the name to be the same as your project name in step 1.

9Under "Physical path" textbox, click "..." button.

10Select the folder you created in step 4.

11The result will be like this. Then click "OK".

12The website will be created like this.

13Open Visual Studio as administrator, click "File" => "Open" => "Web Site ...".

14Under "IIS Sites" => "Default Web Site", select the website node you created in step 12. Then click "Open".

15Yeah! Right now your project is running on Local IIS. You can noticed that the project name will be the URL like this.

1Right click your project, then click "Open Folder in File Explorer".

2Copy everything in this folder.

3Open Visual Studio, click "File" => "Open" => "Web Site ... ".

4Click on "IIS Express Sites" node, and click "Create New Site" button on upper right corner.

5Name your website, then click "Open".

6Visual Studio will create empty project for you. After that, right click the project, then click "Open Folder in File Explorer".

7Paste content that you copied from step 2.

8The result will be like this.

9Go back to Visual Studio, click "File" => "Close Solution".

10Reopen the solution again by repeat step 5. You will see that the project file is displayed

Yeah! Right now your project is running on IIS Express.
Happy Coding!


Move from local IIS to IIS Express


Yeah! Right now your project is running on IIS Express.
Happy Coding!
No comments:
Post a Comment